Installing an intercom in your motorcycle helmet can greatly enhance your riding experience. With Bluetooth technology, you can stay connected with mates, enjoy music, and get GPS directions all while on the road. To start, ensure you have the right system for your helmet, such as Cardo or Packtalk, which are known for their high-quality features and ease of use.
Begin by removing the lining from your helmet to access the interior. Attach the speaker and microphone units inside, making sure they are securely positioned near your ears and chin respectively. Carefully thread the cables through the lining and reassemble the helmet. Follow the instructions provided by your intercom manufacturer to pair the device with your phone or GPS. This setup will make your rides safer and more enjoyable, as you’ll be able to communicate effectively without needing to stop.

Steps to Install the Open-Face Helmet Communication
Follow these steps to install a communication system in your helmet, ensuring seamless audio, connectivity, and comfort while riding.
1. Selecting the Right Intercom System for Your Ride
Choosing the best helmet intercom system depends on both your budget and needs:
- Bluetooth Intercoms: Ideal for solo rides or smaller groups, Bluetooth systems provide reliable wireless connections with features like FM radio, voice-activated controls, and easy device pairing. Leading brands like Sena and Cardo offer popular options in this category.
- Mesh Intercoms: Great for larger group rides, Mesh systems enable seamless 4-way communication, offering better range and hands-free use. Although Mesh intercoms are pricier, they deliver superior performance, especially on long trips.
Consider factors like battery life, water resistance, and ease of installation based on your head size and helmet fit. Integrated systems are also on the rise, providing quality performance at a reasonable cost.
2. Installing Bluetooth Helmet Speakers
- Prepare the Helmet: Remove ear pads and head padding to reveal the ear cavities inside the helmet.
- Clean the Surface: Use an alcohol pad to clean the interior areas where the speakers will attach. A secure connection is crucial for clear audio quality.
- Attach Helmet Speakers: Place VELCRO hooks on the speaker pads and press them into the ear cavity. For the best fit, adjust using spacers if necessary.
- Secure Cords: Run the speaker cord along the rear of the helmet, ensuring a neat, snug setup before reattaching the padding.
3. Installing the Microphone in Your Helmet
- For Full-Face Helmets: Attach a corded microphone near the chin bar using a VELCRO pad. Ensure the cord runs smoothly along the inner rim to prevent discomfort.
- For Modular or Open-Face Helmets: A boom mic works best, attaching to the cheek area with an adjustable pad. Make sure the cords connect properly to the audio cradle, adjusting for a comfortable fit based on your head size.
4. Attaching the Audio Cradle
- Position the Cradle: Choose the lower left side of the helmet for easy reach while riding.
- Attach Helmet Cradle: Use a clip or glue plate to secure it:
- Clip Option: Slide under the helmet rim, tightening as needed for stability.
- Glue Plate Option: Place on a clean surface and allow 24 hours for a strong bond.
A well-placed, stable audio cradle ensures a safer and more comfortable ride.
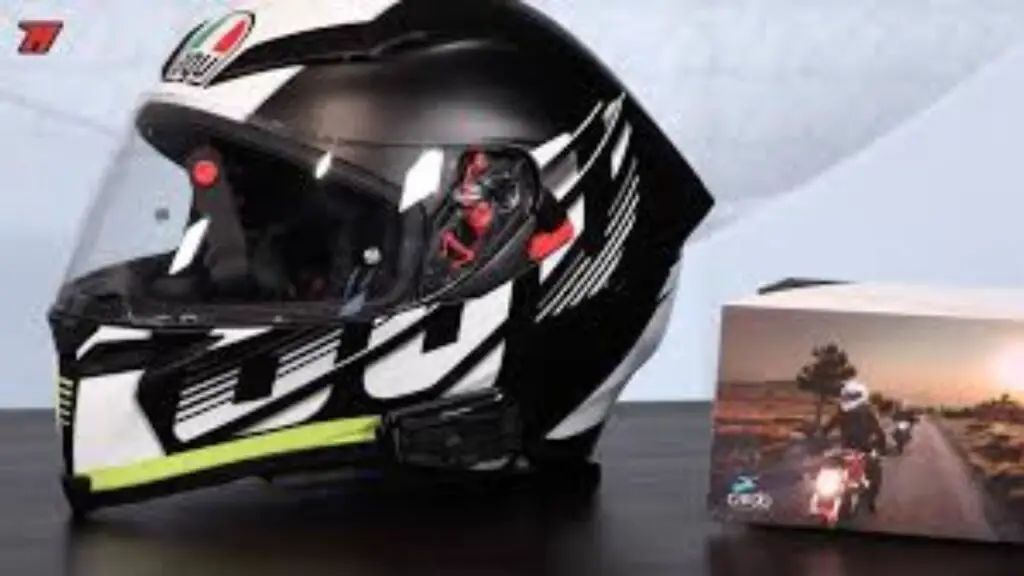
5. Attaching the Audio Unit to the Cradle
Align the connectors from the audio unit and snap it into the cradle, following any arrows for accurate placement. If using an integrated boom microphone, position the mic about an inch from your mouth to maintain clear audio during rides. Bad helmet setups, such as loose mounts or poor positioning, can disrupt sound quality and stability.
6. Connecting Your Devices
- Wireless Intercoms: Enable Bluetooth on your phone, then hold the intercom power button until it pairs. Select the intercom name in your device’s Bluetooth settings to connect.
- Group or Mesh Intercoms: Follow device-specific pairing instructions to link up with other riders for smooth, hands-free conversations.
- Wired Intercoms: Connect the cable from the base unit to the correct port. Make sure the built-in speakers and microphone are securely attached for effective two-way communication.
7. Checking Your Intercom System
To test your helmet communication setup:
- Adjust Settings: Connect base units, adjust volume, and follow any manufacturer guidelines for the best audio quality.
- Test for Audio Clarity: Call or talk to another rider to check for static, distortion, or dropped connection quality. Adjust for comfort and sound quality if needed.
Remember to also periodically check if your helmet is set to expire, as older helmets may not provide adequate protection or stability for added accessories.
So Why Do I Need An Intercom?
Using an intercom while riding offers several advantages that can make your journeys safer and more enjoyable. Firstly, intercoms enable hands-free communication, which is crucial for maintaining focus on the road. You can easily chat with your passengers or fellow riders without taking your hands off the handlebars. This feature is particularly useful when navigating through dangerous locations or managing complex GPS systems.
Moreover, having an intercom helps in reducing risks and crashes. By allowing you to stay connected, you can quickly communicate about potential hazards or changes in the route, thus enhancing overall safety. The real-time exchange of information can prevent misunderstandings and ensure a smoother, more coordinated riding experience. Given the physical safety benefits and the added fun of sharing moments with mates, installing an intercom in your helmet is a smart move for anyone serious about safe and enjoyable motorcycle adventures.
Where to Place Your Intercom on the Helmet
When figuring out the best place to mount the intercom on your helmet, you should consider the type of helmet you have. For a full-face helmet, the intercom is usually installed on the left side, making it easier to access while riding. If you’re using an open-face or modular helmet, you may need a boom mic kit for the microphone, which attaches to the inside of the helmet near your head. This setup keeps the Bluetooth unit stable, while the helmet speakers can be placed around the ear area. If you’re using a half helmet, it’s important to note that a microphone boom may be needed, along with optional mounts to securely hold the audio cradle and speakers.
It’s essential to ensure that the intercom is securely installed to avoid any distractions during the ride. The microphone and Bluetooth unit should also be carefully positioned, especially in a full-face helmet, to allow for clear communication. Installing the system correctly will enhance both comfort and audio quality while riding.
Conclusion
Installing a motorcycle intercom system can enhance your riding experience by keeping you connected with friends and family on the open road. While the process might seem complicated at first, following simple steps and using the right setup resources can make it a straightforward task. Consider features that are important to you, such as wireless connectivity and battery life, and refer to setup handbooks or video clips for guidance. Whether you choose a Chinese brand like Fodsports M1s or another option, proper installation ensures you get the most out of your intercom system and enjoy seamless communication throughout your rides.
Should a Motorcycle Helmet Squeeze Your Cheeks?
FAQs
Can you put speakers in a motorcycle helmet?
Yes, in most states, it is completely legal to use motorcycle helmet speakers. That said, even if these devices can help keep you safe, some states don’t want riders rocking out to music while driving.
How do people talk through motorcycle helmets?
The microphone and speaker are usually built into the helmet itself, offering premium audio quality. Although they are frequently the priciest choice, they are the most practical and user-friendly.
Does Cardo fit on any helmet?
All Cardo communication devices are universally compatible with the vast majority of modern helmets. From my experience, installing a Cardo system was easy and worked perfectly with my helmet, ensuring clear and consistent communication.
About the Author
I am Daniel Ken, an experienced motorcycle rider with 8 years on the road, and I specialize in writing about motorcycle helmets. I share expert insights on helmet safety, comfort, and style, helping fellow riders choose the best gear. My knowledge covers top safety standards, helmet types, premium materials, and advanced ventilation and noise reduction features.